



Sweet and Salty Valentines
If you're like me, I'm always short on time and high on ambition... Especially when it comes to holiday treats. These sweet and salty Valentine treats deliver on both levels.
Simply cover a baking sheet in a single layer of miniature pretzels and place a Hershey's Kiss on top of each pretzel. Carefully place the baking sheet in a 250 degree oven for 2 1/2 minutes. Immediately press a single M&M in the center of each Kiss.
Transfer the pan to the freezer for about 5 minutes to help these treats set up faster.
Having a bunch if pretzels left over, I decided to dip a few in some melted almond bark and then in red sprinkles just to finish off the ensemble.
The whole ordeal took me all of 20 minutes. Happy Valentine's Day!


Blueberry Butter
There is no comparison between blueberry waffles and regular waffles.
The blueberry waffles (albeit store-bought) are serious tantalizing, but they were out of the frozen blueberry waffles last time we were at the grocery store. The frozen fruit is situated directly adjacent to the waffles, which gave me this idea.

Allow a stick of butter to soften on the counter and then add 1/8 of a cup of frozen blueberries and blend together with a fork.
Spoon the contents into a plastic baggie and distribute it evenly across the bottom of the bag. You can squish it into the shape of a cylinder or you can use your fingers to flatten the sides to make more of a square butter shape (as I have above).
Seal the baggie and place it in the refrigerator overnight. If you want to use it sooner, put it in the freezer for 30 minutes or until it is firm enough to slice.
I think regular frozen waffles topped with homemade blueberry butter and sprinkled with powdered sugar or hot maple syrup may be the new quick and easy go-to breakfast in this farm kitchen.
Welcome to the farm! Enjoy.
Homemade Salad To-Go
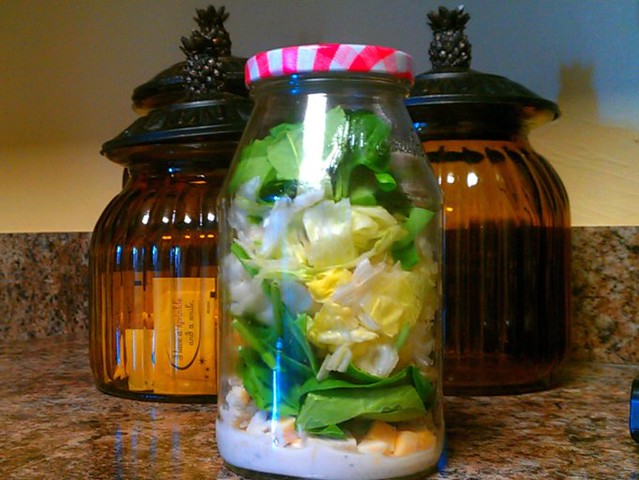
If you're like me and it pains you to pay nearly $6 for a fast food salad when you're on the run, only to find that it's made of mostly Iceberg lettuce, browned slightly and light on the chicken, here's your fix.
I must confess that this idea is not original. I discovered it on Pinterest. I love that place. You should follow me on Pinterest - I pin lots of good stuff.
The original description says to use a mason jar, but I didn't want to go buy new ones, so I just used a large jelly jar that I sterilized in the dishwasher.
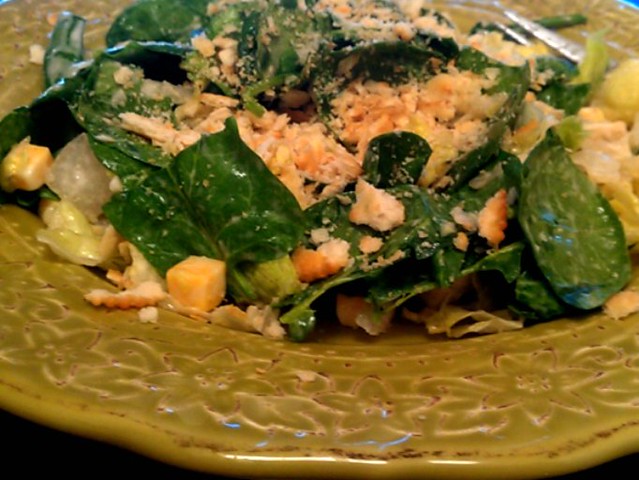
Pour two tablespoons of your favorite dressing on the bottom of the jar (yes, that is enough!) and then either add chunks of meat or cheese or diced vegetables. The goal is that the lettuce doesn't touch the dressing until you're ready to eat it. Then, simply fill with the greens of your choice. Here I've used half Iceberg lettuce for some crunch and half baby spinach because it is delicious.
I've also covered it in crumbled up Ritz crackers - also delicious.
Store it in the fridge for up to a week (maybe even longer if it doesn't brown) and when you're ready to eat it, simply shake and the salad dressing will coat the entire mixture. Genius. My hat is off to whoever thought of this!
Pumpkin Coffee Bread

You will need:
1 cup of butter
1 1/2 cups of sugar
1 teaspoon of vanilla
2 eggs
2 cups of flour
1 teaspoon of baking powder
1/2 teaspoon of baking soda
1/2 teaspoon of salt
1 teaspoon of ground cinnamon
1 cup of solid pack pumpkin
1/2 cup of Dutch apple yogurt
(You may substitute a mixture of vanilla yogurt and Dutch apple baby food)
Directions:
Cream sugar and butter, add vanilla and eggs (one at a time, beating after each addition).
Sift the dry ingredients together.
Combine the yogurt and pumpkin in a small bowl. Add yogurt-pumpkin mixture and sugar-butter mixture to dry ingredients alternately, beginning and ending with the sugar mixture.
(Don't ask me why... this is just how she does it. If it makes you feel better, you can also spin around three times and throw a dash of salt over your shoulder for good measure.)
Pour 1/2 of the batter into a buttered 9 1/2 inch tube or bundt pan, top with 1/2 of the topping mixture* and cover with remaining batter, then add the rest of the topping mixture.
(I use a bundt pan because it makes for a prettier presentation.)
Bake at 350 degrees for 55-60 minutes.
*Topping: Combine 1/3 cup of firmly packed brown sugar, 1/4 cup of granulated sugar, 1 teaspoon of cinnamon and 1 cup of chopped pecans.

If you make this recipe, we would love to know about it! Send us a photo and let us know if you made any substitutions or revisions of your own!
A Simple Birthday Celebration
My eldest son was born on New Years Day 2005. This has made birthday celebrations a little tricky at times, but has also made me realize that simpler really is better. The years that I have gone out of my way to make complicated (and expensive) birthday plans, it has only brought undue stress to all of us.


I'm not about to get wild and tell you how I made all of this from scratch - because I didn't. The cake and cookie mixes were on sale for $0.37 each because they were in holiday themed packaging. (Man, I love bargains.) Now, granted, the cake does have red and green flecks in the batter, but I asked him and he didn't care. We decided that it looked like confetti anyway.
We've invited friends and family who were going to be in the area to meet us at a pizza place that has arcade games and go-karts. They have an all-you-can-eat buffet and plenty of room. I didn't make a big fuss with themed plates and napkins and cups and hats, because all a seven-year-old boy really wants to do is open presents and play games, anyway. I have discovered that often, the "big fuss" is more important to the moms than it actually is to the kiddos.
So, next time you're stressing about making sure your child's birthday as special as possible, stop and think about which parts of it they are actually going to remember and just focus on those and let the other details fall to the wayside. You'll be glad you did.
Linda's Texas Caramel Corn

My mom (Linda) has made this every Christmas since 1976 when a friend of hers in Dallas shared the recipe. This is a holiday staple in our family - enjoy!
Combine:
2 cups of brown sugar
2 sticks of real butter
1/2 cup of white Karo syrup
1/4 tsp. of cream of tartar
Boil for 5 minutes
Remove from heat and add
1 1/4 tsp. of baking soda
Beat down the foam and pour over
6 quarts of plain popcorn (or enough to fill a turkey roasting pan)
(Linda recommends air popped Jolly Time Yellow Popcorn)*
Bake for 1 hour at 200 degrees, stirring every 15 minutes
*Linda suggests shaking the large container of popcorn for a few seconds so the "old maids" go to the bottom and then scooping it out into the roasting pan a cup-full at a time to avoid having un-popped kernels in your caramel corn. Even if it tastes spectacular, you'll be in the doghouse if someone chips their tooth!
Old Pumpkin = New Christmas Decor

I've kept it simple with white spray paint and a poinsettia and pine sprig, but you can use gold or silver or even glittered spray paint.
These pumpkins have been a part of my outdoor decor from September to December this year.
Talk about stretching your dollar.

